Olla Irrigation
by Hunter Flynn

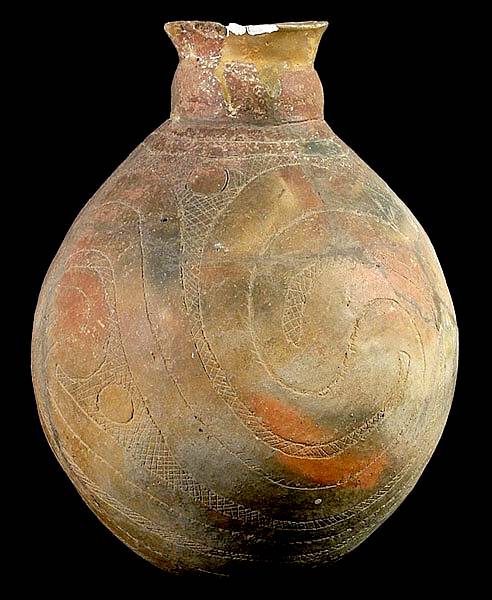
An olla dating from AD 1400-1600.
Image: http://www.texasbeyondhistory.net/tejas/clay/images/cs25-70.html.
Hunter is a Farmer at the Common Ground Mini-Farm in Willits, CA. He specializes in arid and low-natural rainfall farming techniques and practices.
An olla is an unglazed, indigenous, earthen pot used for irrigation. When buried neck-deep in the ground, filled with water, with crops planted adjacent to it, the clay pot effects sub-surface irrigation as water seeps out of it. The micro-porous walls of an olla do not allow water to flow freely from the pot, but guide seeping water where suction develops, due to soil-moisture tension and the plant roots themselves.
The possible benefits of using ollas to irrigate include:
- Water savings of approximately 70%
- Reduction in soil erosion
- Reduction in frequency of watering
- Supply of water directly to plant roots
To install and use ollas, space them three feet apart for best performance. If using more than one, make sure to place them far enough apart that the wetting zones don’t overlap. When you’ve decided where you want the olla, prepare a hole for it. Using either a post-hole digger or a shovel, dig a hole approximately one foot deep and one foot wide. Place the olla in the hole and cover the olla with soil. Only the top 2-3” of the neck of the olla should be visible above ground. Fill the olla completely with water; once it is filled it will only need to be topped off every 2-3 days. Cover the olla opening with a lid or rock. It is critical to keep the olla at least 50% full at all times. Water levels less than 50% will prevent the olla from secreting enough water to the surrounding plants. After the olla is installed you should overhead-water to moisten the soil.
Creeping crops that crawl along the soil floor and inhibit direct sunlight from reaching the topsoil make great companions to the olla. Cucumbers, winter and summer squash, tomatoes, and peppers are crops commonly grown with ollas. Ollas also do well in large pots or containers with herbs.
When transplanting seedlings, do overhead-water for the first 7-10 days to assure the newly transplanted seedlings have sufficient water.
Proper Use of an Olla–Avoid Making a Beginner’s Mistakes
- For those farmers/gardeners who have a rainy season:
- Cultivate the soil in the fall before the rain. Ollas are self-regulating pots of water, but they have a limit to which they can irrigate the soil. Take advantage of the water from the winter rains.
- Consider deep cultivation: prepare the bed by triple-digging in the fall, before the rains, to allow the greatest amount of water to seep into the ground throughout the winter. Double-digging is adequate if the soil is overly compacted.
- Build organic matter in the soil by planting winter grains with deep roots. All these steps will assist the ollas in maximizing their irrigating action.
- The ollas should be inserted in the planting season following the above steps.
- Plant early in the season
- The later in the season you plant the more likely the reservoir of water in the soil has been depleted.
- Use large, well-established transplants
- Ollas water the sub-soil, leaving the topsoil mostly dry. Tall, well-established transplants have a greater chance of reaching deep into the soil to access water from the reservoir below.
- Space the olla and plantings carefully
- Ollas should be spaced three feet apart in the bed, measuring from the center of the olla neck.
- The area directly around the olla neck can become overly saturated, negatively influencing the plant. Therefore, it is best to space the plants twelve inches away from the olla.
- Choose crops that cover the soil, and mulch
- You can greatly reduce potential evaporation by spacing plants closely, choosing crops that tend to crawl throughout the bed and create a groundcover, or by applying a three-inch layer of stone mulch. Stone mulching greatly reduces evaporation and acts as a temperature regulator that can hold in warmth during cooler nights.

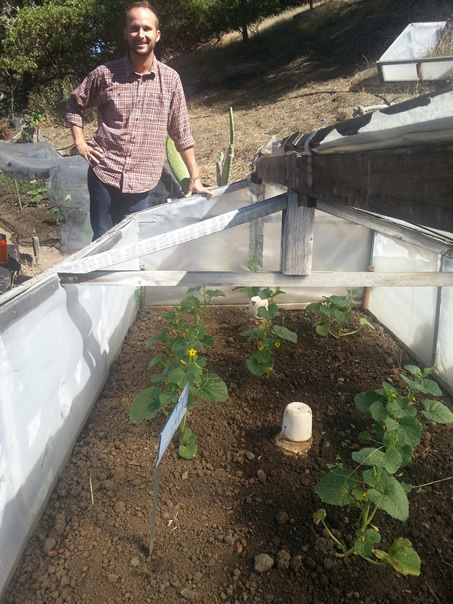
Hunter surveys the bed where buried ollas are irrigating young melon plants
top | Newsletter Home | Article Index | Archive

|


