What We're Planting Now:
Biointensive Potato Protocol
by Ecology Action Staff

IMAGE CREDITS: EA staff
Planting potatoes on St. Patrick’s Day (March
17) is a tradition among US farmers. While
planting on a specific holiday doesn't guarantee
high yields, it’s true for many in the Northern
Hemisphere that planting potatoes mid-March
leads to in an early summer harvest. That said, using
local frost dates is the best way to determinate
your ideal planting date. For example, here at The
Jeavons Center, we plant potatoes in mid-February,
which is best for our 5-Month main growing
season, using the GROW BIOINTENSIVE (GB) protocol
below to achieve an excellent harvest of these
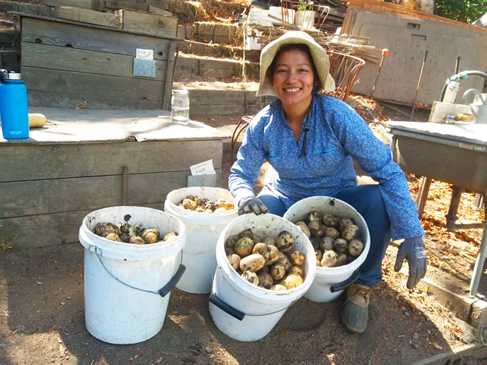
high-calorie root crops. 2019 TJC Intern Marcia
is pictured above with a bumper crop grown this
way. Try it with your own planting date and see
what you harvest!
Goal: to plant 30lbs of seed potato and harvest
180lbs (~2 times the US average), a 6:1 ratio between
yield and seed. GB beginning yields are 100
lb/100 sq ft; intermediate yields are 200 lb/100 sq
ft; and high yields can be 400 lb/100 sq ft, possibly
more.
- Use 65-day maturing potatoes. Nutrient density
and yield for 65-, 90- and 120-day-maturing potatoes
are the same, so there no reason to grow
120-day varieties. Yukon Gold is a 65-day variety
we like: it stores well and tastes delicious.
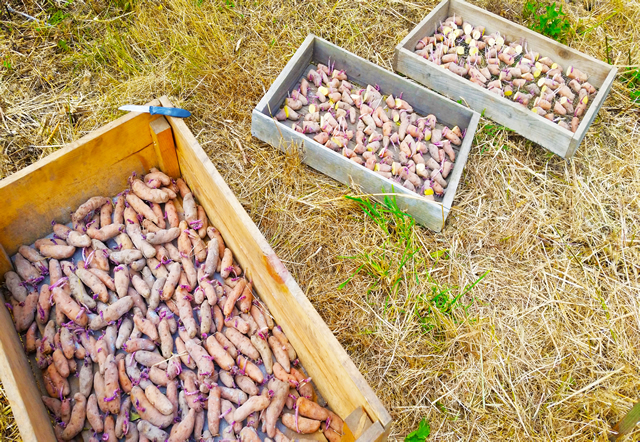
- It can take up to a month for potatoes to initially
sprout, so make a note on your calendar to begin sprouting your seed potatoes to have
them ready in time for planting. Long sprouts
on potatoes will give 10% more yield than short
sprouts because there are more nodes, but you
can use shorter sprouts if that is all you’ve got.
(The Henry Doubleday Association in England
carried out extensive research on growing potatoes,
and found they got the best harvests with
20cm-long sprouts!)
- Three days before planting sprouted potatoes,
cut the potatoes into pieces with two sprouting
nodes and about 2 ounces of weight per piece—
about the size of a large egg.

- Use wood ash to prevent rot: dip the cut edge of
the sprouted potato in ash, and then let them
dry out in a shaded, warmish area for 3 days
before planting.
- Double-dig the growing bed simultaneously
while planting potatoes, and organize the spacing
according to whether the sprouts are long
or short. Long sprouts can be spaced closer together
than shorter sprouts: place the potato
pieces with long sprouts oriented horizontally
along the top part of the already loosened lower
trench in a bed that is being double-dug; place
shorter sprouts in the trench with the sprouts
oriented vertically. For Willits and other areas
with cool nights, plant them 9” deep with the
normal 9” offset spacing. Also, read the potato
planting section in HTGMV/2017, p. 26.
- Yields will be highest where the soil is warmest,
one foot in from the side of the beds.
You can use a Mini Greenhouse (MG) or
Agribon row covers to extend your growing
season. Some hints for using a MG:
- There are two types of mini greenhouses: 12-
inch or 18-inch high at shoulder (see p. 206,
HTGMV/2017 for building plans). Soil heat level
is higher with 12” shoulder MG, while heat
rises more to the top with an 18” shoulder MG.
- Monitor the air and soil temperature to make
sure your potatoes aren’t getting too hot. Use a
soil thermometer to determine best time to water.
Also, compare watering when soil temp is
high with warm (not hot) water if possible.
- MG Seals: place a looped-over piece of plastic
along the edges of the MG ridgepole where the
doors meet the ridge, and staple the touching
edges of the loop to the ridge pole so that the
outside air will be sealed off from the inside air
of the MG. This will prevent heat from escaping. HOWEVER:
- Oxygen Sickness: too much oxygen released by plants inside the MG can impair growth. If it’s cold you need to vent the oxygen but retain heat. Fast Release: Open MG door for at least 1 minute during the hottest time of the day to allow excess oxygen to exit the MG (in Willits we do this in spring at 1-2pm; in summer 4pm; fall 1-2pm; winter 12-1pm). Slow Release: Crack MG door for 30 minutes. Need four, 1x2x12-inch pieces of wood, placed on a diagonal on both sides of doors. Crack open or open 11/2 inches depending on which way you turn wood.
- Take tops of MG off when the potatoes start to touch the doors.
Watering
- Watering should take place between 2-4pm so the soil has time to warm up the cold water before nighttime temperatures arrive.
- Watering should last at least 1½ -2 minutes per 100 square feet, and up to 3 minutes if necessary.
- Highest yield of potatoes occurs when soil is evenly moist at 36 inches deep.
- Watering during rain and snow with MG:
- Still need to vent oxygen.
- There will be some in-soak from pathways.
- First finger-check soil moisture inside MG at edge and in the middle of the bed. If dry inside, open doors for about 20 min on each side to let rain in.
- Do not let snow in. It will add cold to the air and soil inside the MG.
Trellising potatoes increases longevity and therefore increases yield. When potato plants fall over, it tells the roots to stop production of new tubers.
- Using 6-foot-long wooden 1”x1” stakes, drive nails into the top of each stake, but leave enough protruding that you can wrap trellis string around it.
- Place a stake at each corner and additional stakes 5 ft apart along the length of the bed.
- Tie your first trellis string to the stake 18 inches from the ground, and the second trellis string at 36 inches from the ground. Each 5-foot section of trellis string between stakes should run along each sides of the bed, and across to form a diagonal “X” over the middle of the bed. (If you are using a MG, you only need an X trellis string across the bed at 18 inches, because the sides of the greenhouse will help to hold up the plants).
Hot Weather and Shade Netting
- Potatoes like cool weather 60-65F. The acceptable range for them is 45-75F.
- When the weather is hot and the MG doors have been removed, drape 30% shade netting over the nails to cover the top and path sides of the potato bed. Shade netting is normally placed this way between 10 am and 5pm at TJC. After 5pm flip the shade netting so that one side of the nails is holding all the shade netting. Do not allow the shade netting to rest on top of the plants.
Harvest
- When to harvest: 75% aboveground biomass is no longer green
- Using a potato fork with wider tines, start at the edge of the path and go straight down, with the handle at an angle so the tines will be less likely to spike the potatoes
- Rotate the fork up and potatoes will lift up
- Use loose soil that no longer has potatoes in it to minimize spiking. Even being careful, 5-10% of your potatoes will be spiked, so eat those right away.
- Once you finish digging the entire bed, go through a second time for 10% more yield
Storage
- Refer to Ecology Action 3-Day Workshop Manual, p. 8.14
- Ideal storage temperature is 38-40F, with 85-90% humidity, which gives an approximate 5-8 months of storage time
- Compartmentalize root cellar to store everything properly: for example, do not store potatoes near apples, as the due to ethylene gas emitted by apples causes potatoes to try to “ripen” faster, leading to sprouting and rotting
Additional resources:
♥
top | Newsletter Home |Table of Contents| Archive

|


